If you need to book a meeting on a family’s behalf you can assign the slot yourself. You can do this at any stage before the meeting.
Step 1 – Open ‘My Schedule’
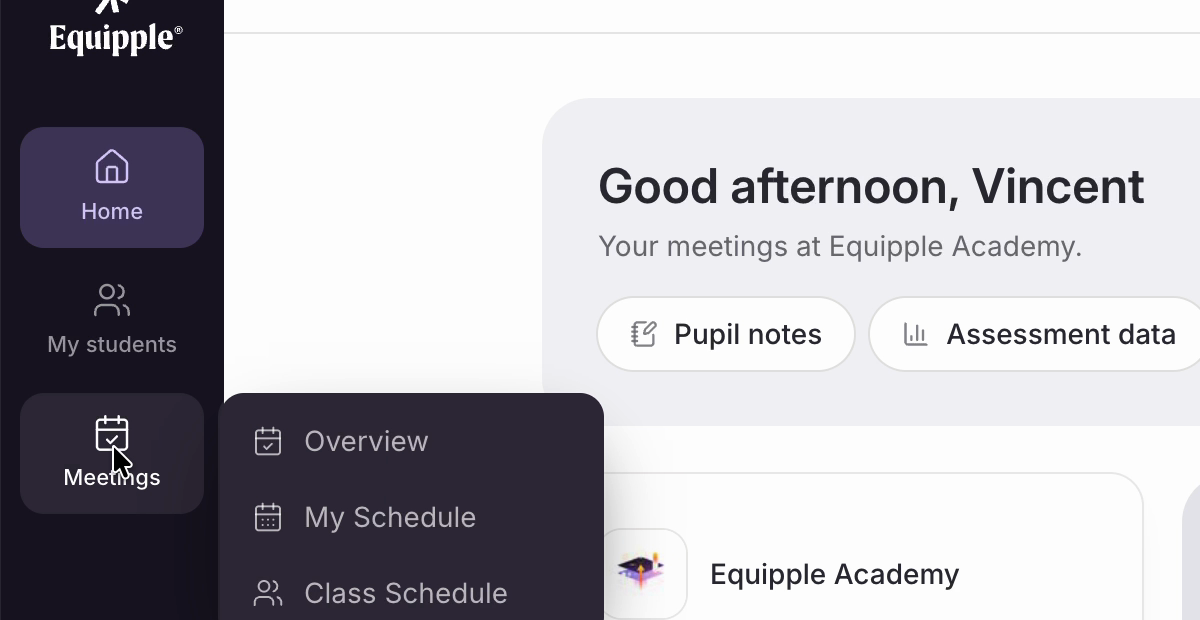
• Click ‘Meetings’ in the left-hand sidebar and choose ‘My Schedule’.
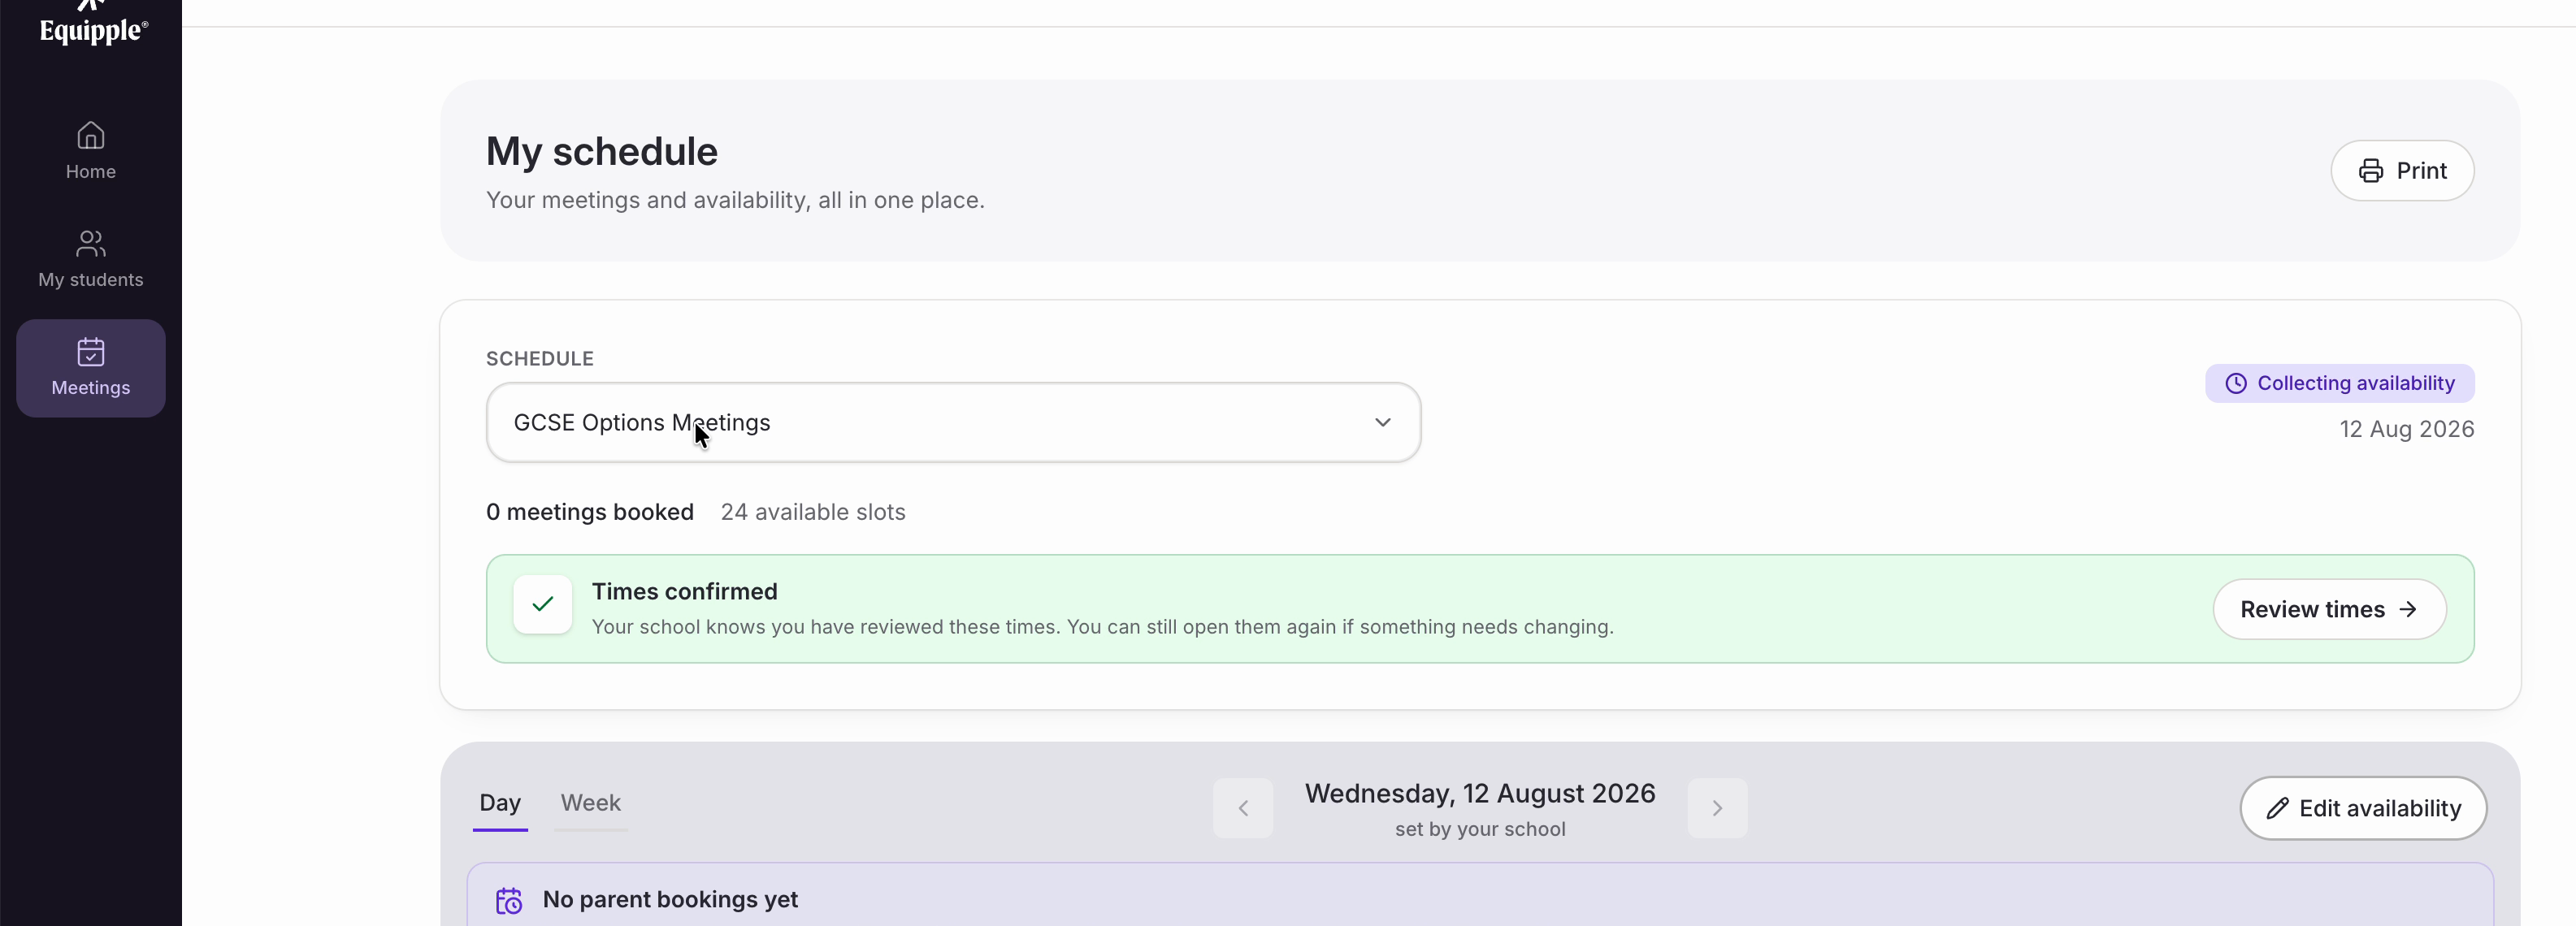
• This is your meetings and availability in one place. Pick the right set of meetings from the ‘Schedule’ dropdown — the count underneath tells you how many meetings are booked and how many slots are still available.
• Use ‘Day’ or ‘Week’ to change the view, and the arrows either side of the date to move between days.
Step 2 – Pick a slot
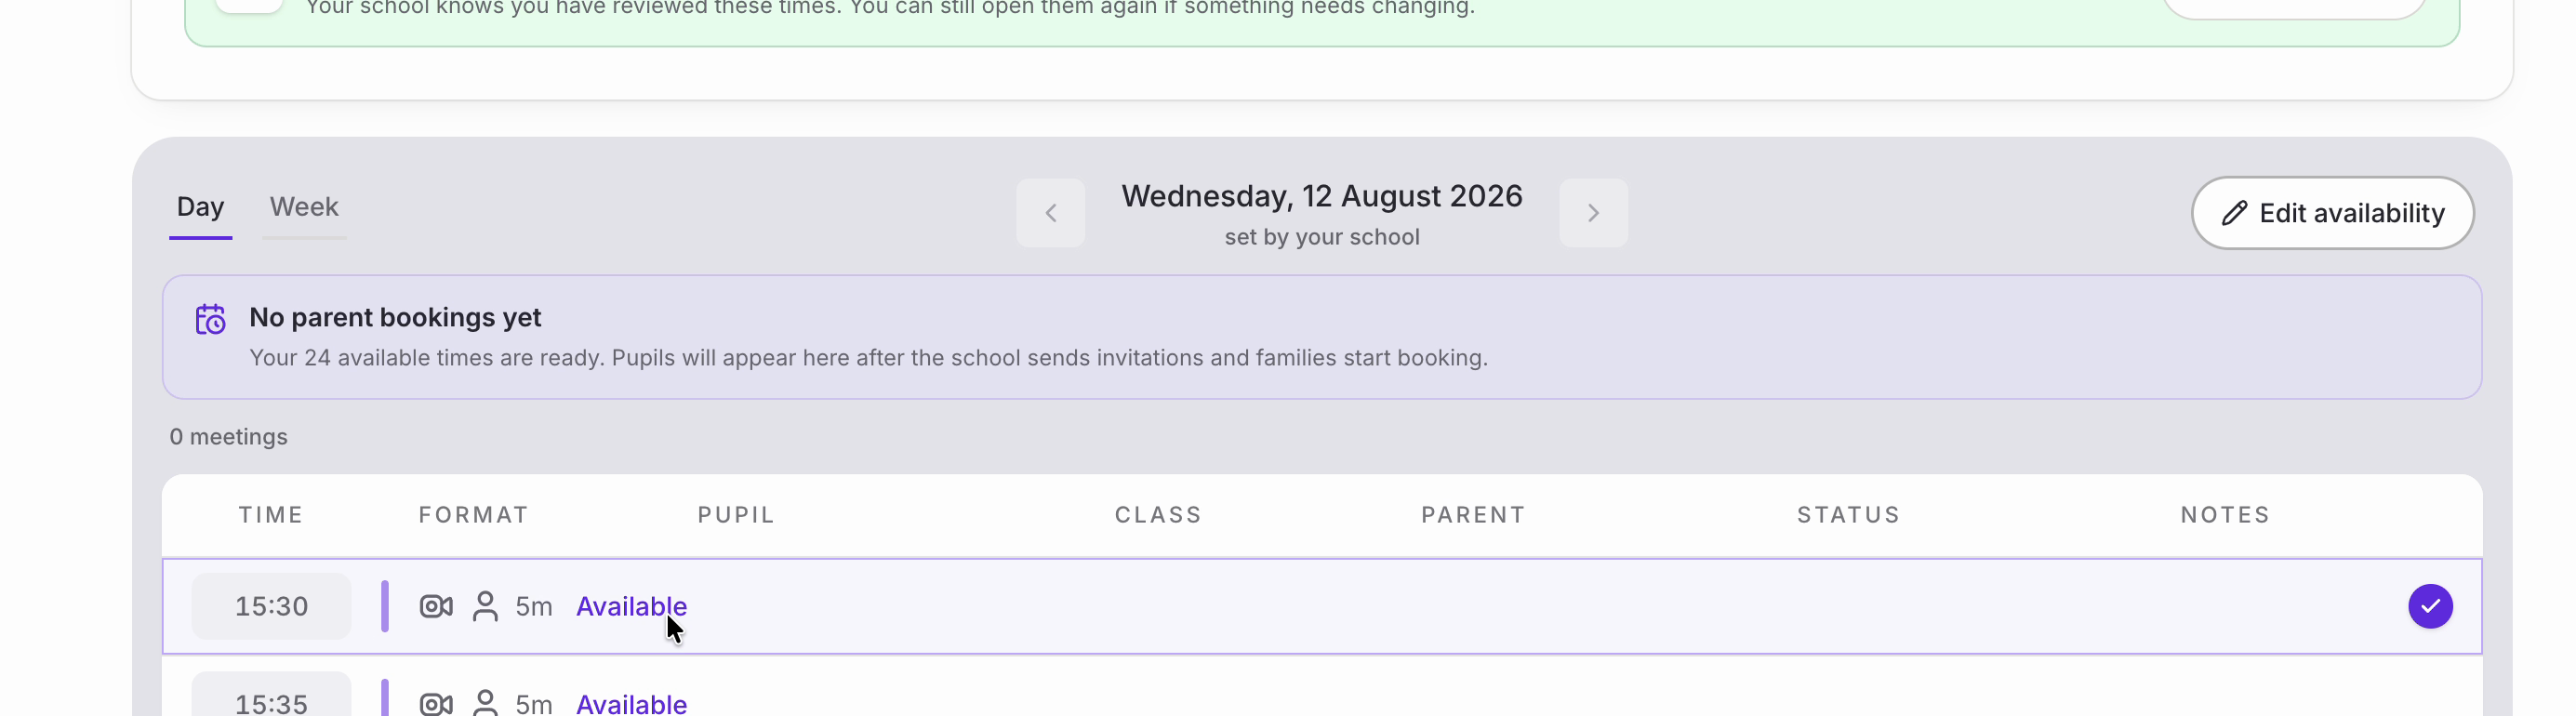
• Your times are listed with their format and length. Click any slot marked ‘Available’ and a tick appears beside it.
• A bar appears along the bottom of the screen showing the date and time you have picked, along with everything you can do with that slot. Click ‘Assign a pupil’.

Nb. The same bar is how you change a slot in other ways. ‘Make available as’ sets which formats a parent can choose, ‘Make unavailable’ takes the slot off your schedule, and ‘Update slot’ saves any changes you make there.
Step 3 – Choose the pupil
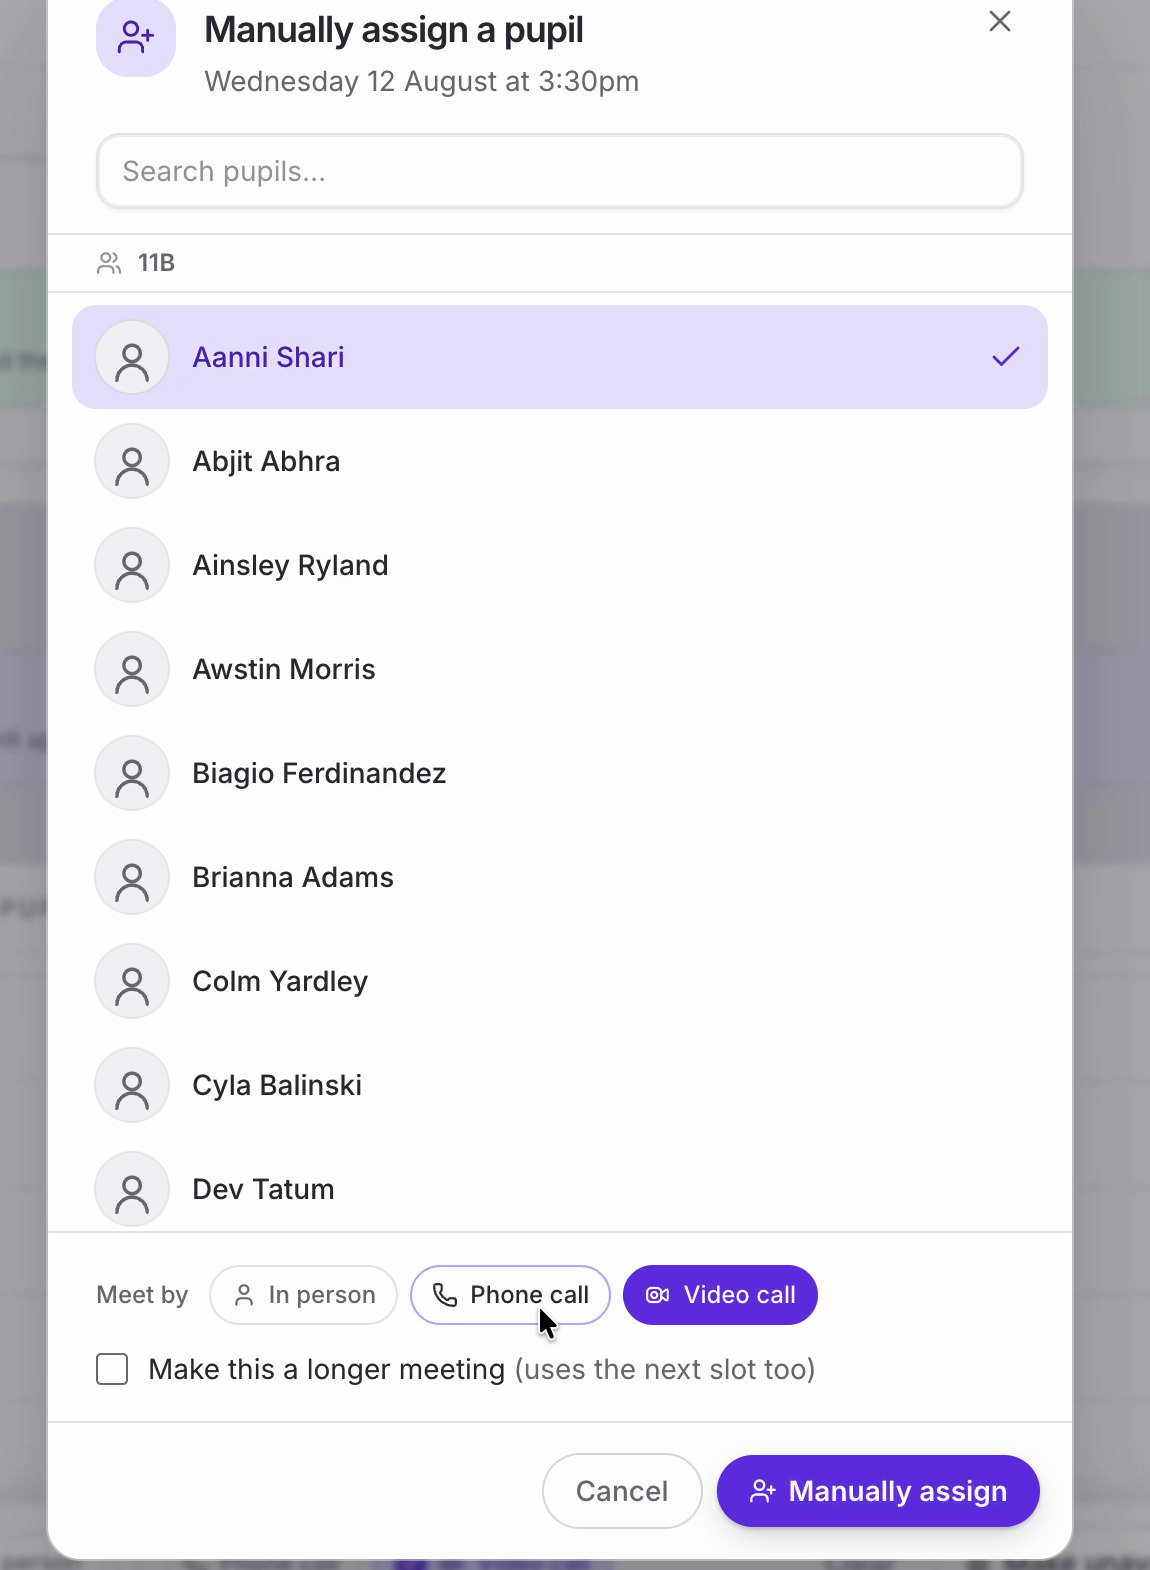
• ‘Manually assign a pupil’ opens, with the date and time you picked underneath the heading.
• Find the child in the list, or start typing in ‘Search pupils’. Pupils are grouped by class. Click a name to select it.
• ‘Meet by’ sets the format for this particular meeting — you can only pick from the formats your school has allowed for this schedule.
• If this family needs longer than a standard slot, tick ‘Make this a longer meeting (uses the next slot too)’.
• When you are ready, click ‘Manually assign’.
Nb. If a pupil already has a meeting with you at that time, they are still shown in the list but greyed out and can’t be selected. Underneath the name you will see when they are booked in with you, which saves you hunting for the clash.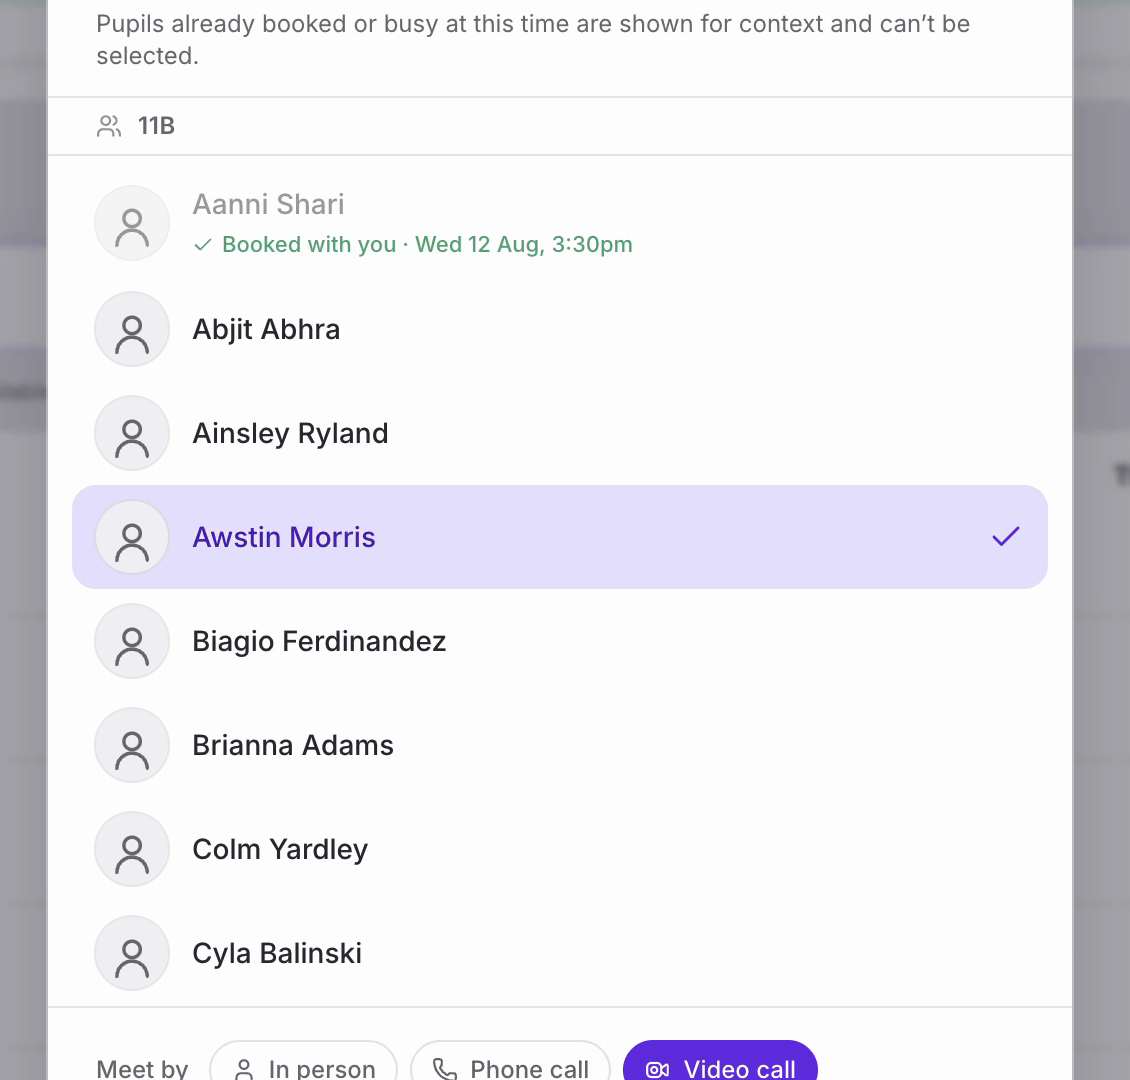
Step 4 – Check it saved
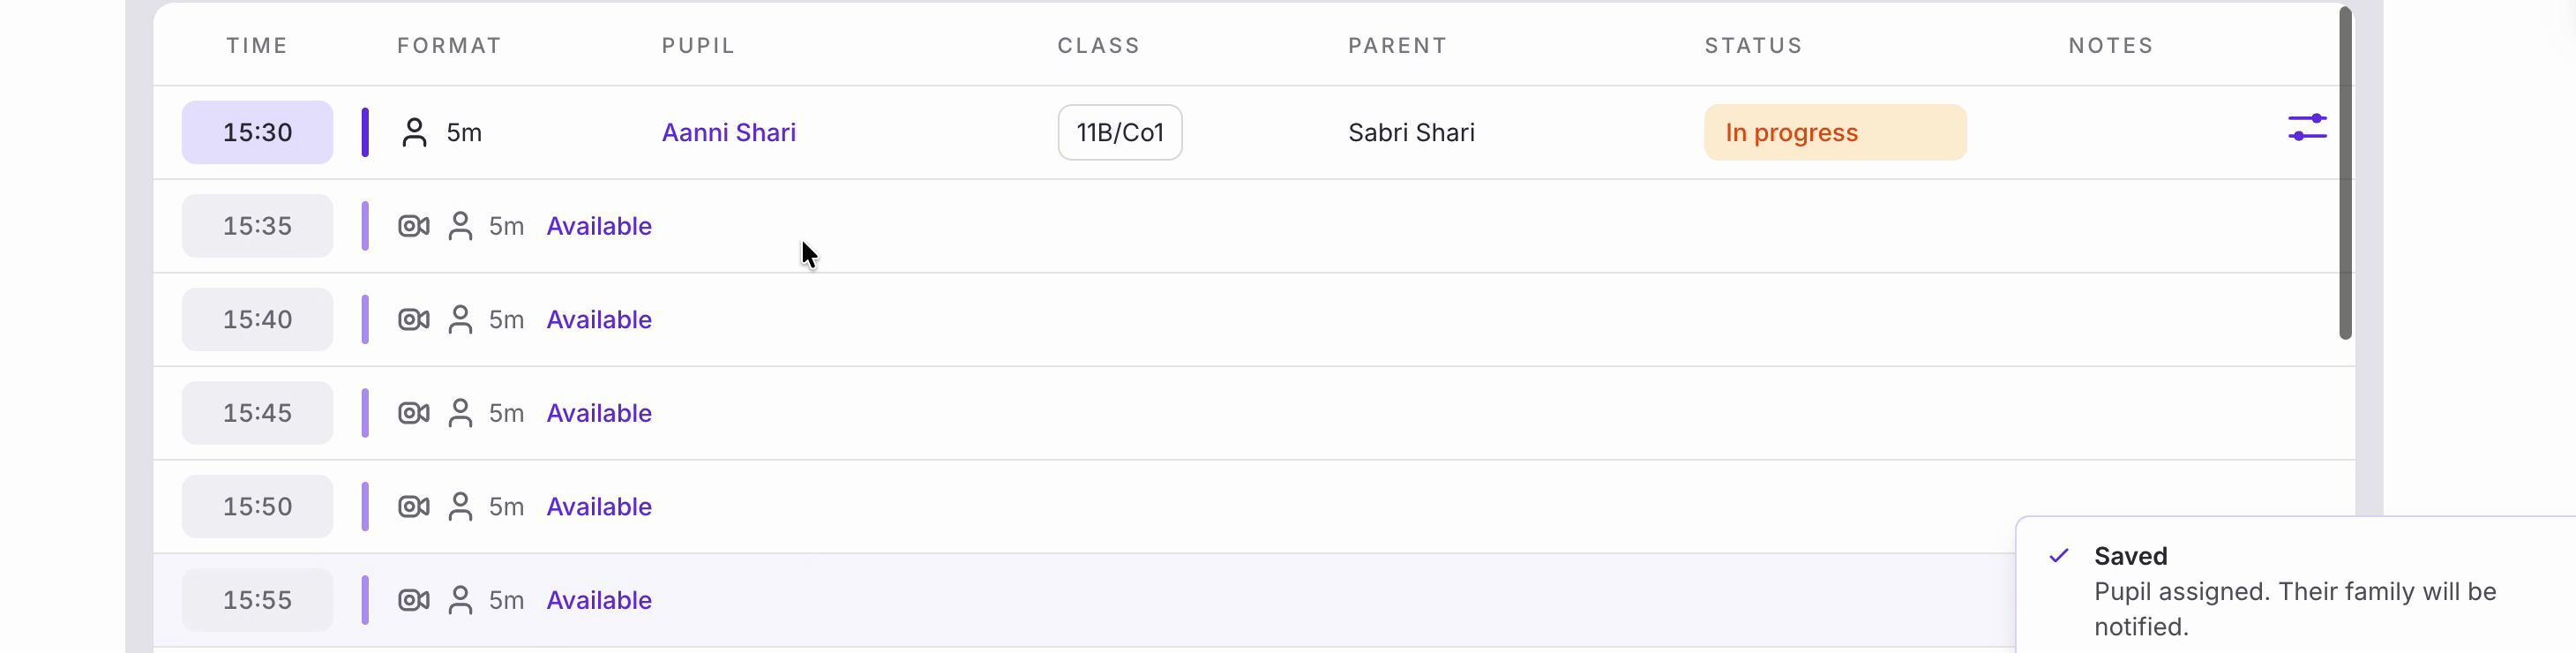
• A ‘Saved’ message confirms the pupil has been assigned and that their family will be notified — you don’t need to contact them separately.
• The slot now shows the pupil’s name, their class, the parent it has gone to, and a status. The booking counts at the top of the page update too.
• Switching to ‘Week’ shows the same booking in context, so you can see how your evenings are filling up across all your meeting days. You can also manually assign meetings in the 'Week View' using the same process.
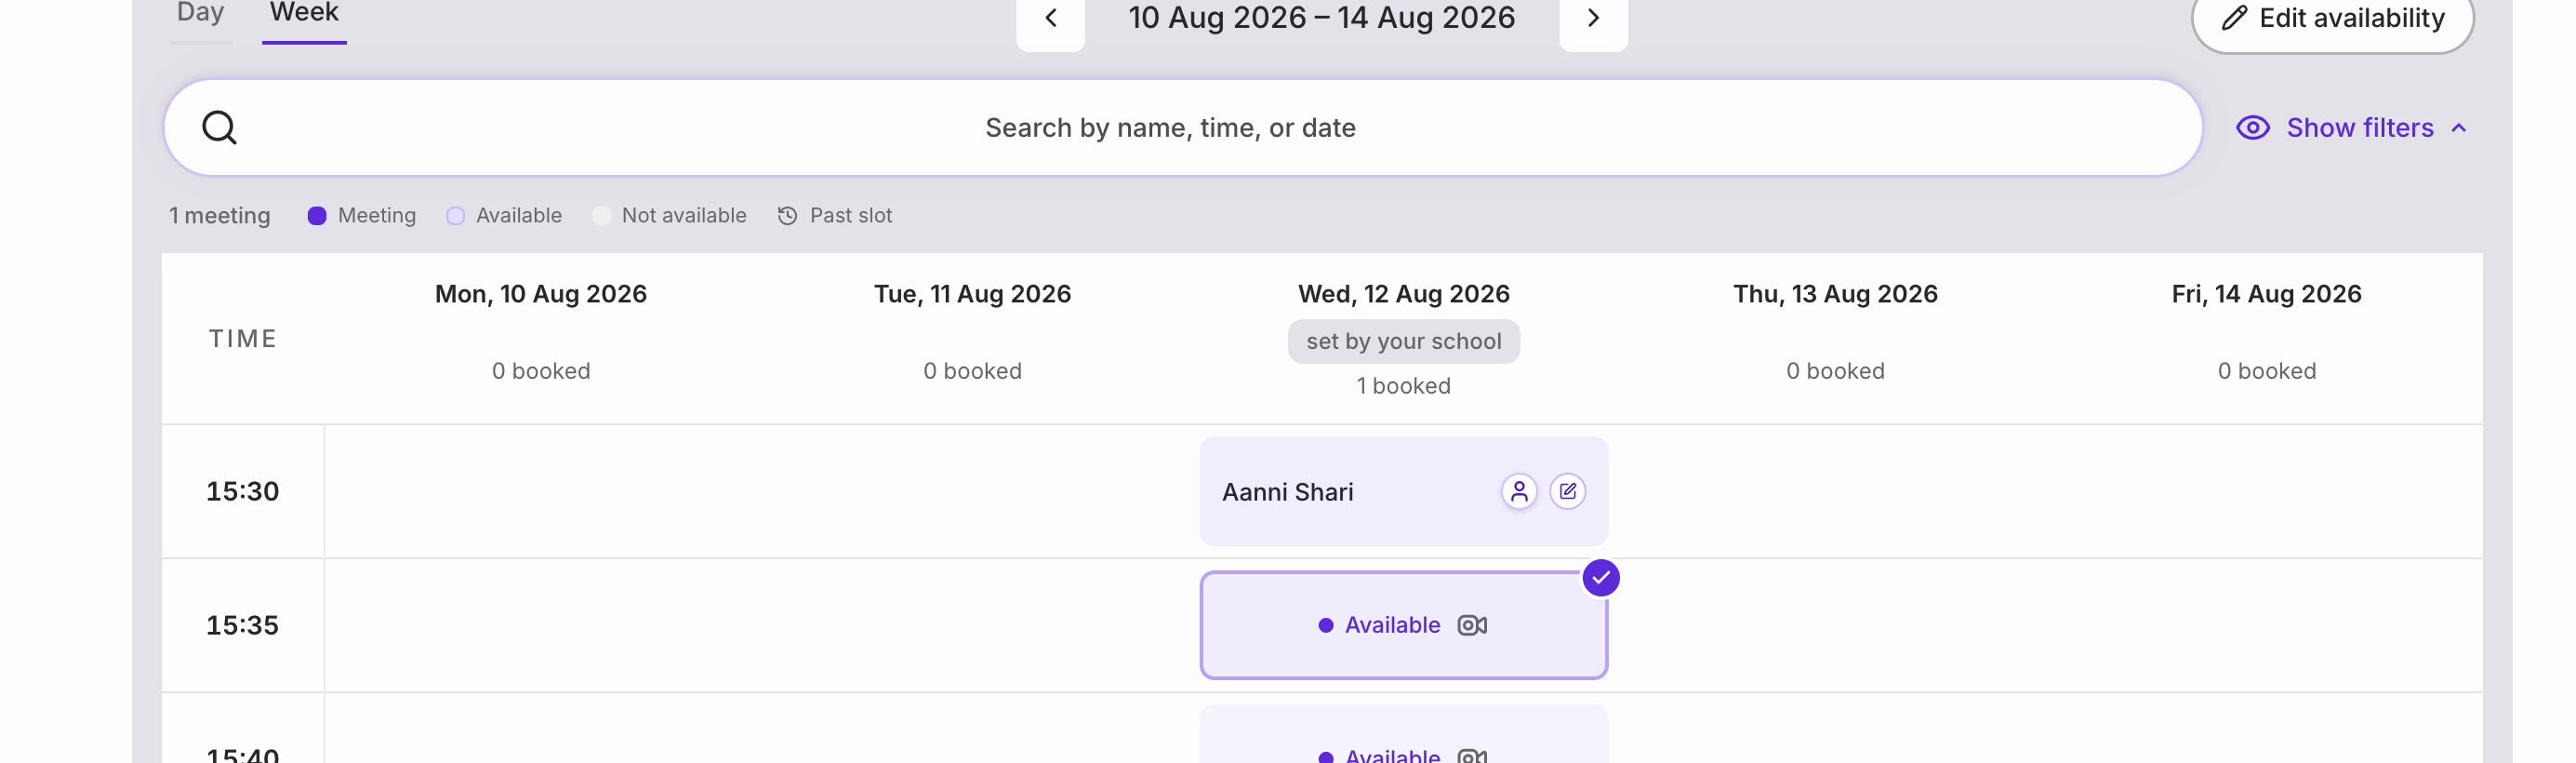
Nb. Once you have a booking, a search box and ‘Show filters’ appear above the list so you can find a meeting by name, time or date.
That’s all there is to it. You can assign as many slots as you need, and amend them at any point before the meeting.
Was this article helpful?
That’s Great!
Thank you for your feedback
Sorry! We couldn't be helpful
Thank you for your feedback
Feedback sent
We appreciate your effort and will try to fix the article