For Class Teachers, follow these instructions for confirm your availability for any upcoming parent-teacher meetings:
Nb. Confirming is helpful rather than essential. If you don’t respond, your standard times are used exactly as they are and parents are still invited on the date your school has set — so nothing is held up. Confirming simply lets your admin know you have checked.
Step 1 – Start from your Home page
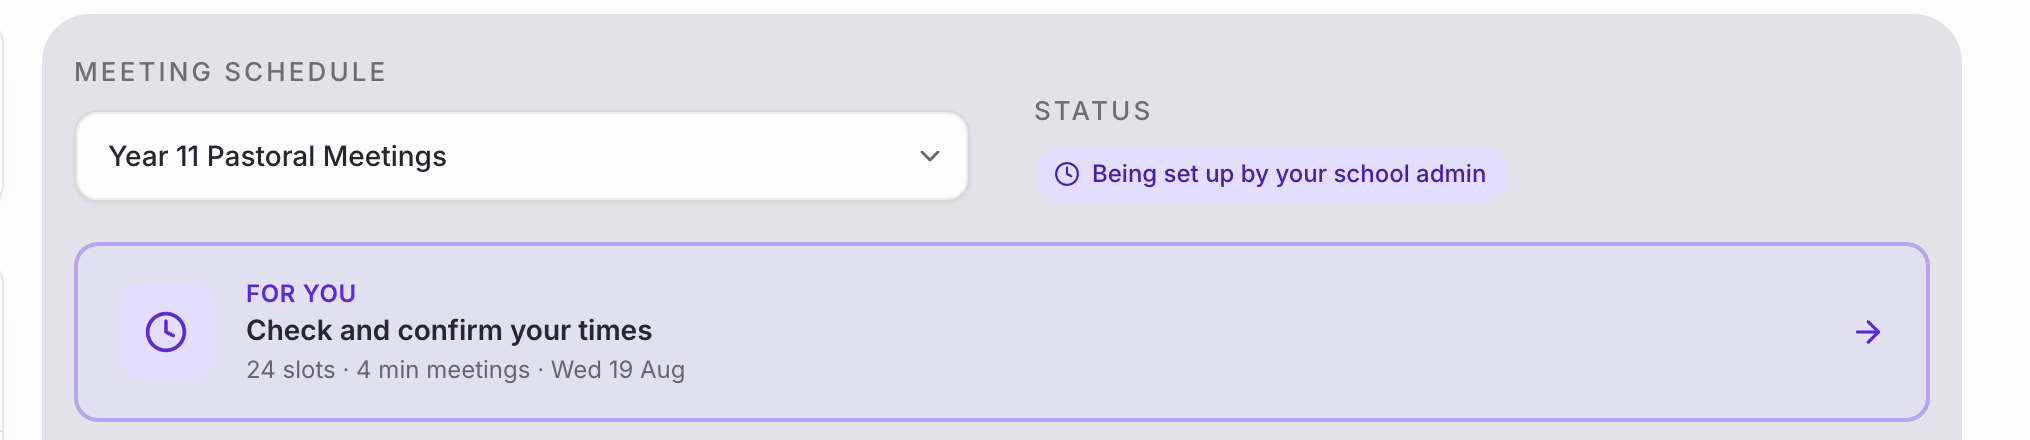
• When something needs you, the ‘For you’ panel says so. Here it reads ‘Check and confirm your times’, with a summary of how many slots you have, how long each meeting is and the date.
• Click the arrow on the right of that panel to go straight there.
Step 2 – Check you’re looking at the right meetings
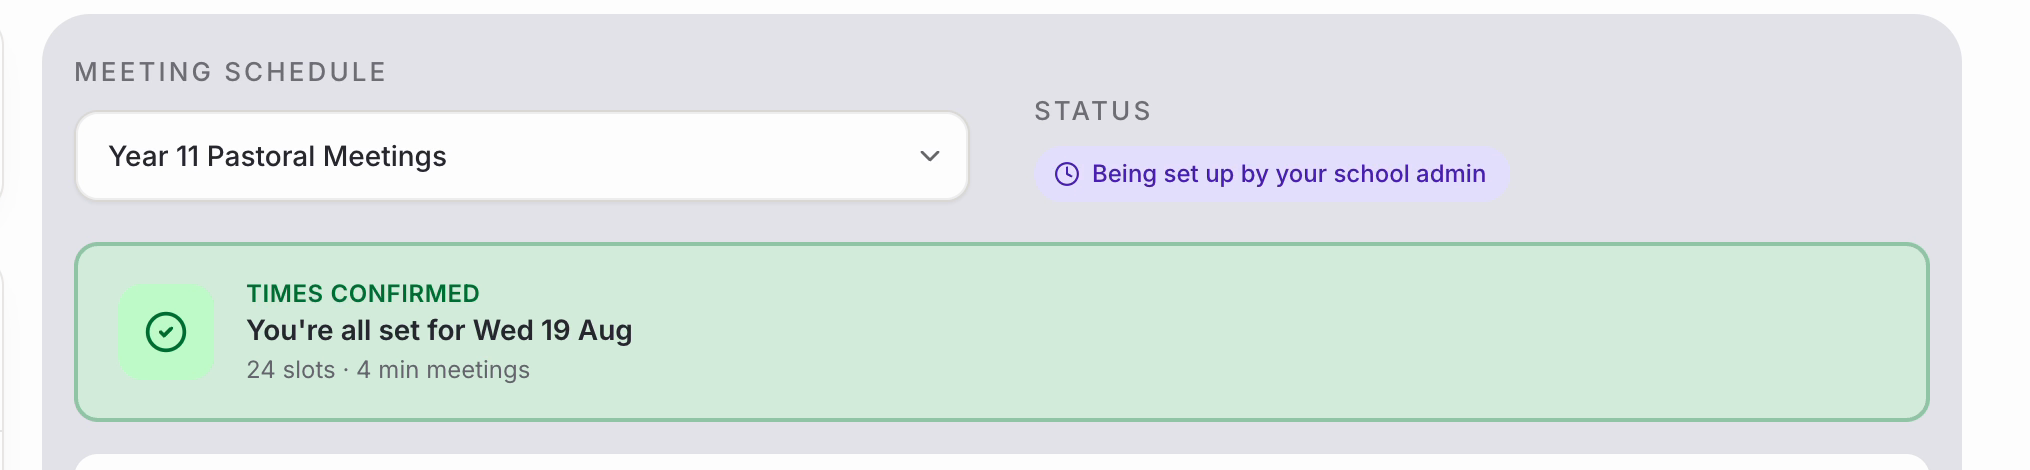
• If your school has more than one set of meetings running, use the ‘Meeting schedule’ dropdown to switch between them. A tick marks the ones you have already confirmed.
• ‘Status’ beside the dropdown tells you where that schedule has got to.

Step 3 – Open ‘My Availability’
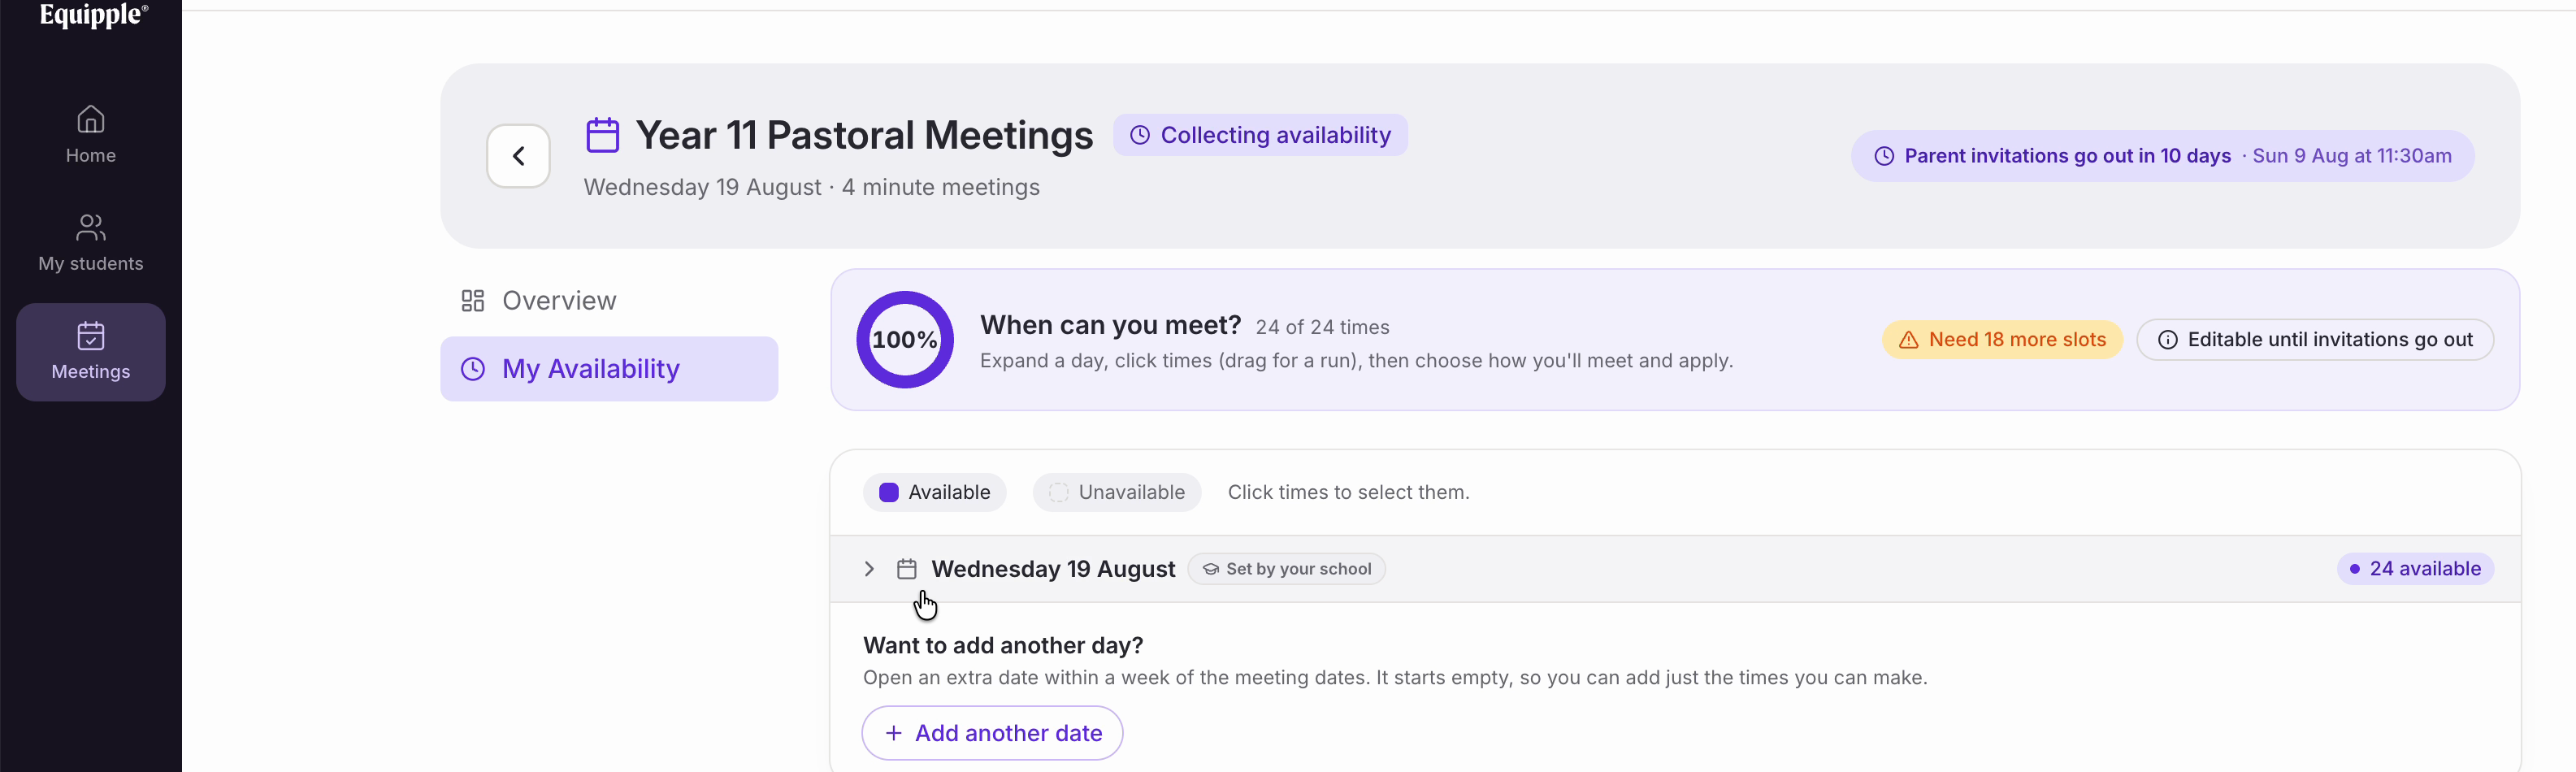
• A meeting schedule has two tabs. ‘Overview’ is where your bookings will appear; ‘My Availability’ is where you check your times.
• The header shows the name of the meetings, the date and how long each meeting is, and counts down to when parent invitations go out.
• The ring shows what proportion of the offered times you are currently available for, and the badges beside it flag anything worth knowing — such as ‘Editable until invitations go out’.
Step 4 – Check your times
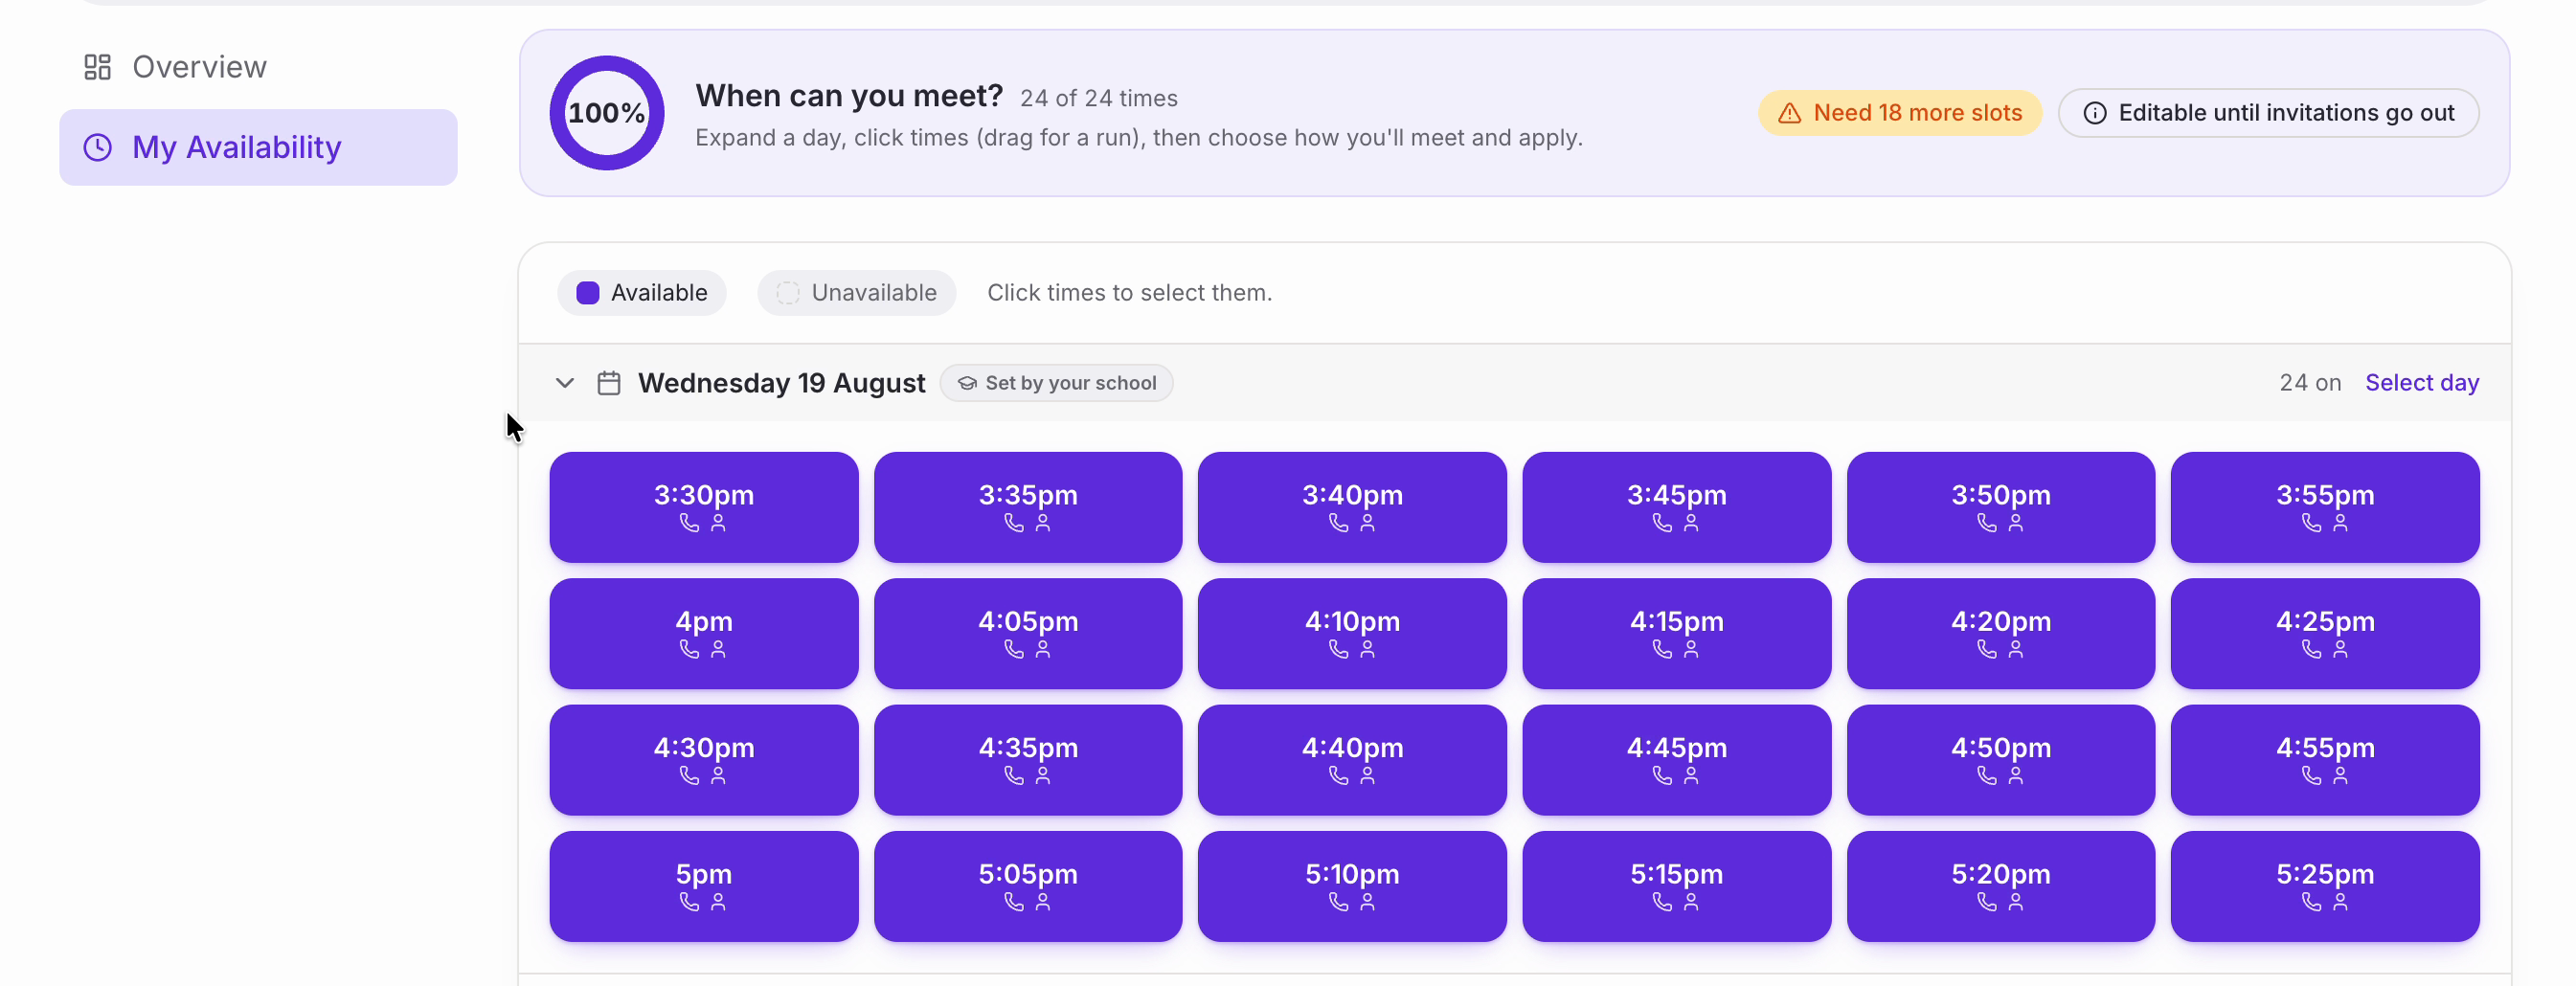
• Click the arrow beside the date to open it. Your times appear as blocks, each with a small icon for the meeting formats available.
• ‘Set by your school’ beside the date means these times came from your admin rather than from you.
• If some of the times don’t work for you, the ‘Available’ and ‘Unavailable’ buttons let you say so: choose which you are setting, then click the times you want, dragging across several to do a run at once.
• If you can offer an extra evening, ‘Want to add another day?’ sits at the bottom of the list. ‘Add another date’ opens a new day within a week of the meeting dates. It starts empty, so you add just the times you can make.
Nb. For more on changing your times, including after you have confirmed them, see Editing Your Availability.
Step 5 – Confirm
• When you are happy, click ‘Confirm my times’ at the bottom of the page.

• The panel changes to ‘Times confirmed’ with a green ‘Confirmed’ badge. You can still change your times afterwards, right up until invitations go out.

Checking it worked
• On the ‘Overview’ tab, the ‘Availability’ card now reads ‘Confirmed’.
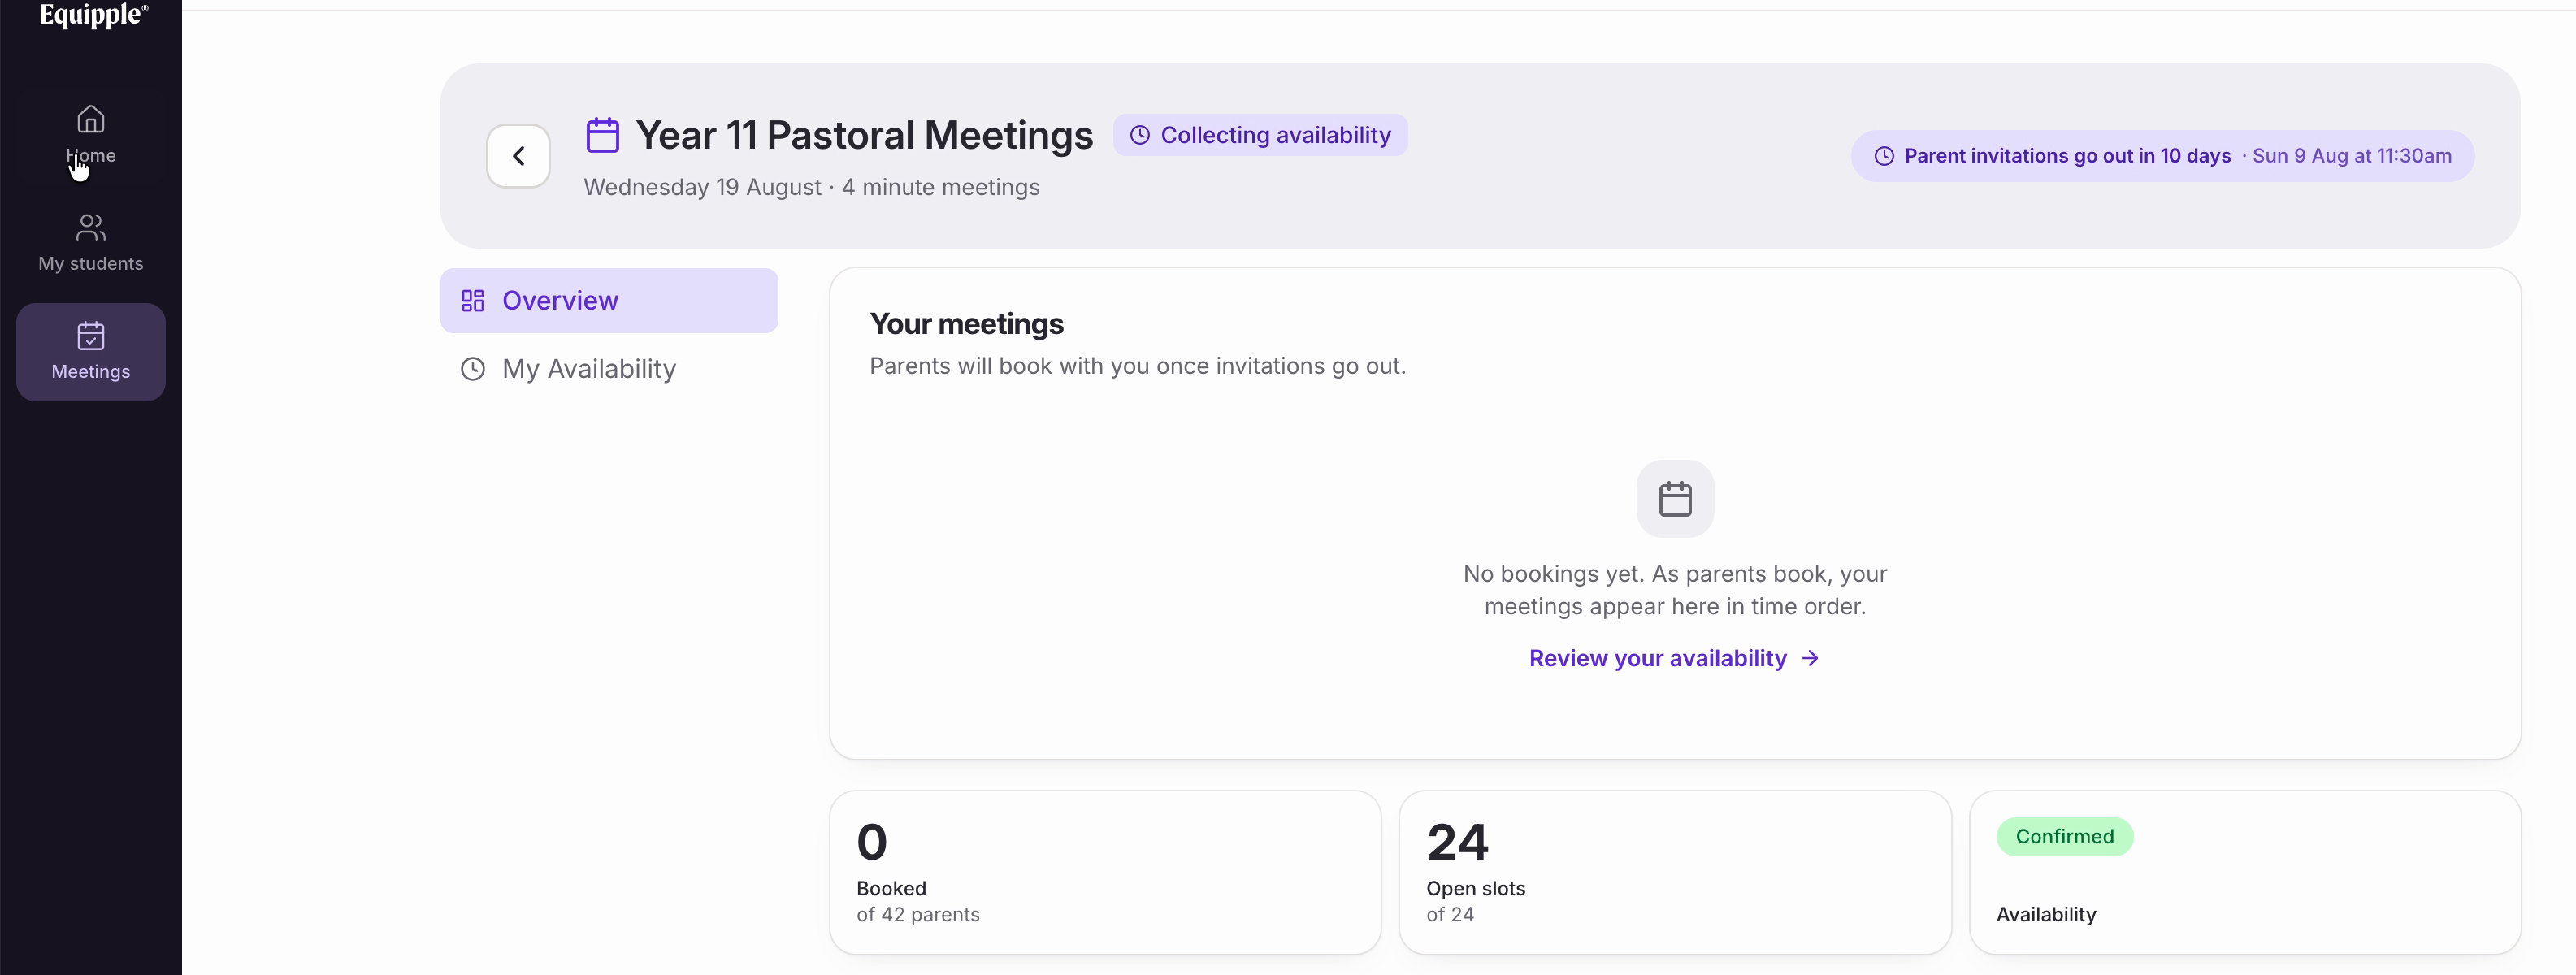
• And back on ‘Home’, the panel turns green and reads ‘Times confirmed’, so you can tell at a glance that there is nothing left for you to do.
Your admin can now see that you have confirmed your availability. Once invitations go live, your bookings will appear under ‘Your meetings’ on the ‘Overview’ tab.
Was this article helpful?
That’s Great!
Thank you for your feedback
Sorry! We couldn't be helpful
Thank you for your feedback
Feedback sent
We appreciate your effort and will try to fix the article