This is an article for School Admins (usually SLT and/or Office staff) only. If you are not a School Admin, you will not have the necessary permissions to follow these steps.Equipple already knows who works at your school — the staff list comes from your school's records. Giving someone access is a matter of ticking their name, choosing what they can do, and sending the invitation.
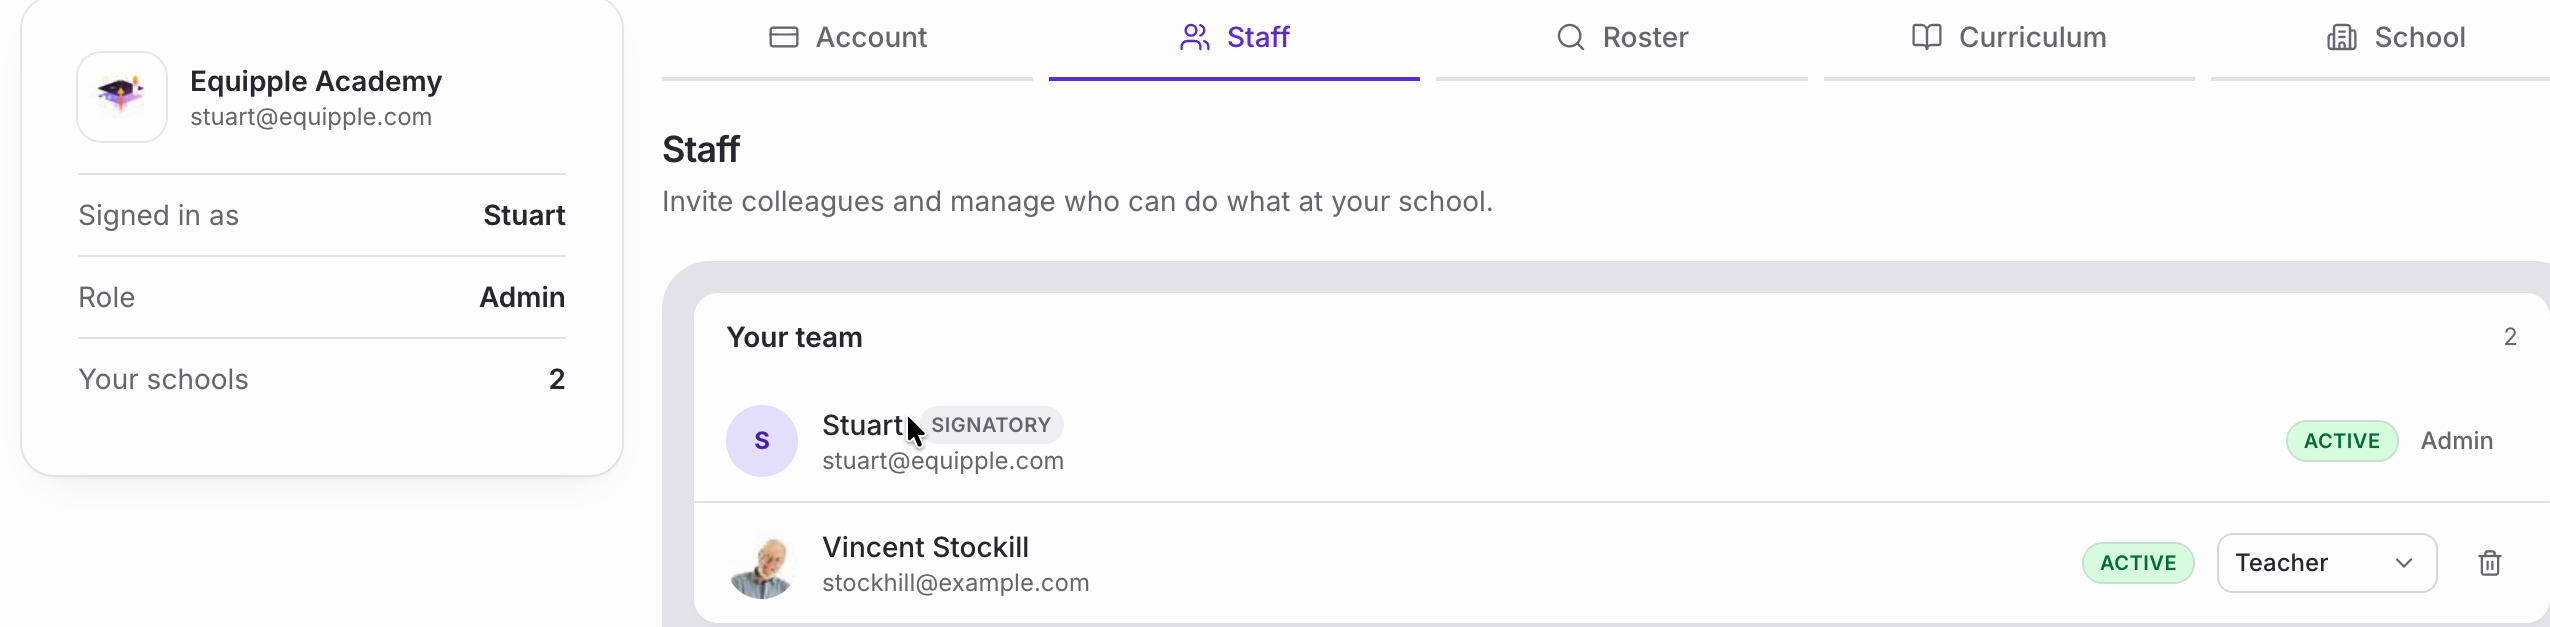
Nb. You need to be an admin to invite people. The card on the left of the Settings page shows your own role, so you can check at a glance.
Step 1 – Open Settings and choose ‘Staff’
• Go to ‘Settings’, then click the ‘Staff’ tab.
• There are two things on this page: ‘Your team’, listing everyone who already has access, and ‘Invite staff’ further down.
Step 2 – Check who already has access
• ‘Your team’ shows each person's status and role, with a count in the corner.
• ‘Active’ means they've accepted and are using Equipple. The person who set the account up is also marked ‘Signatory’.
• Worth a look before you invite anyone, in case they're already on the list.

Step 3 – Find the person you want to invite
• Scroll down to ‘Invite staff’. It lists everyone in your school's records who doesn't have access yet, and the count beside ‘Select all’ tells you how many that is.
• There's no email address to type in — use ‘Search staff by name or email…’ to find who you need, or scroll the list.
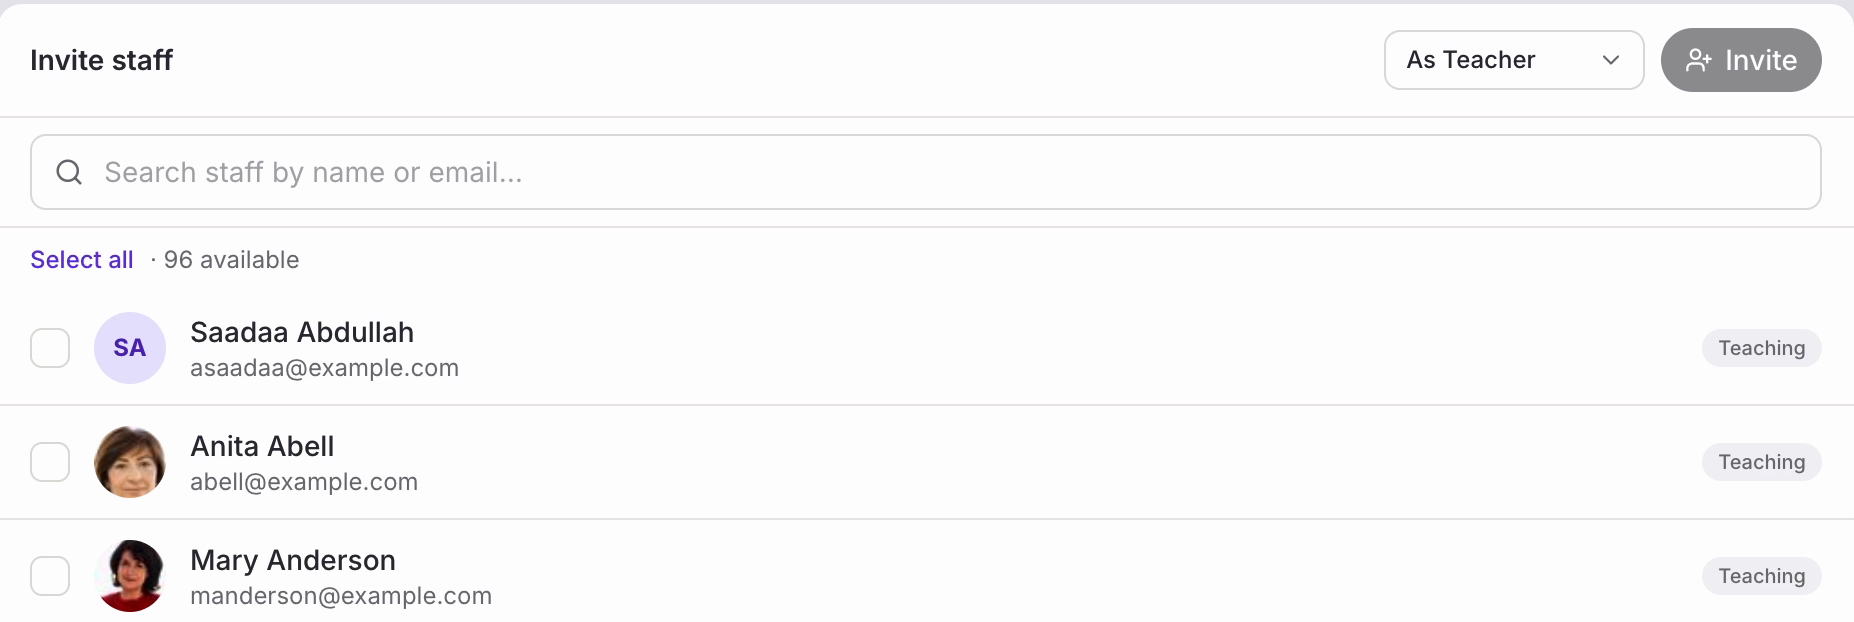
Nb. Can't find someone? They're missing from your school's records rather than from Equipple. Once they're added there, they'll appear in this list.
Step 4 – Choose what they'll be able to do
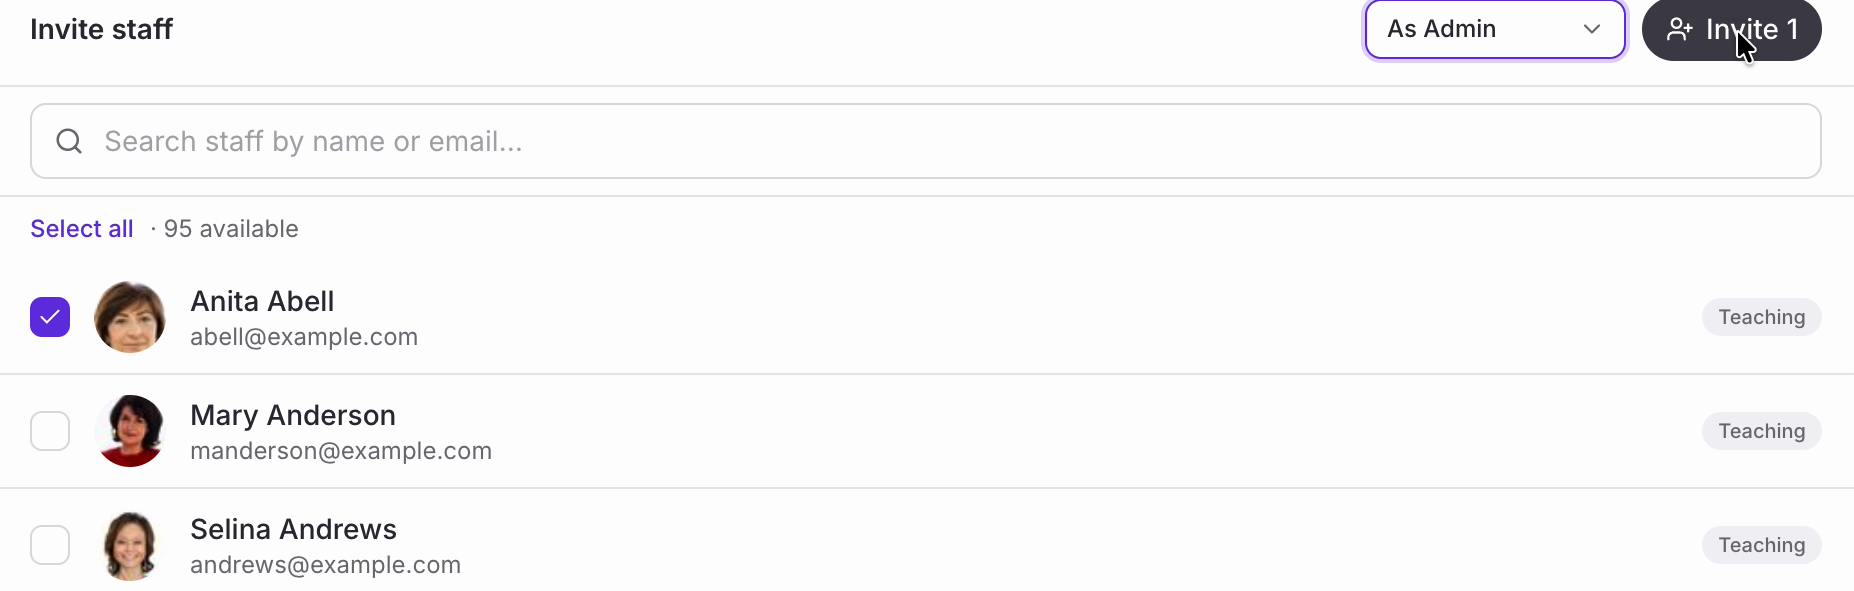
• The dropdown beside the ‘Invite’ button sets the role. It offers three options: ‘As Teacher’, ‘As Coordinator’ and ‘As Admin’.
Whichever you pick applies to everyone you have ticked, not to one person at a time. If you're inviting a mix of roles, either do it in batches — tick the teachers, set the role, invite, then repeat for the others — or invite everyone with the role most of them need and change the exceptions afterwards.
Step 5 – Tick and invite
• Tick the box beside each person you want. The button keeps count as you go — ‘Invite 1’ here.
• Check the role beside it is the one you want, then click it.
• A ‘Staff updated’ message appears in the corner to confirm.

• They move up into ‘Your team’ marked ‘Invited’, with the role you chose beside them.
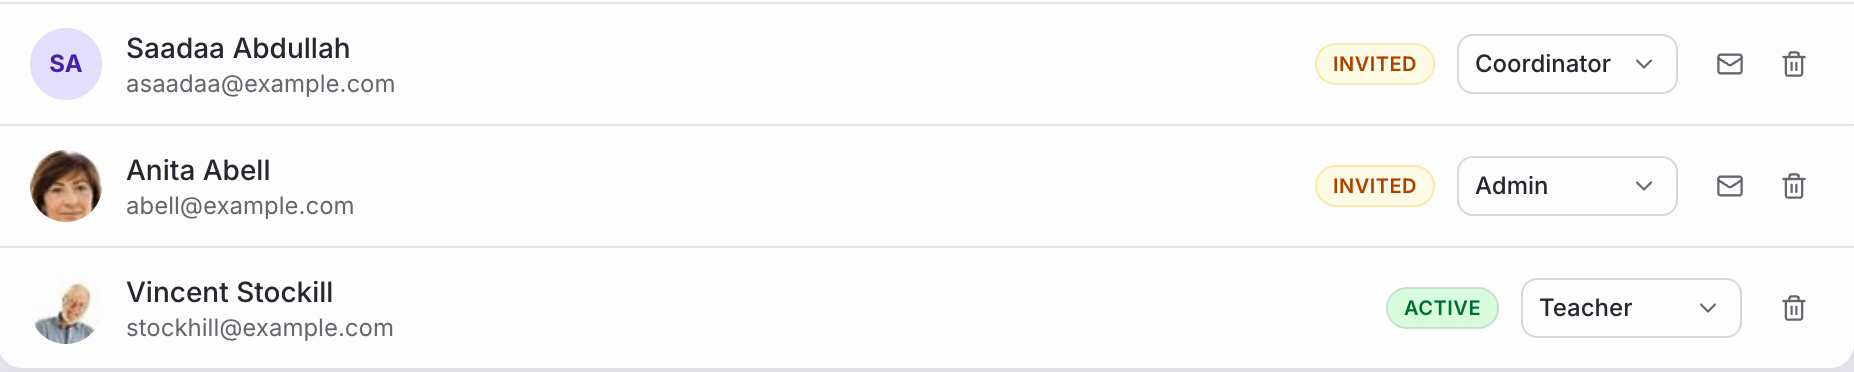
Nb. ‘Invited’ means the invitation has gone but they haven't signed in yet. It changes to ‘Active’ once they do. Each invited row also has an envelope icon for sending the invitation again, and a bin icon for removing their access.
Inviting a lot of people at once
• At the start of a year you'll usually want most of your staff in at once. Keep ticking and the count keeps rising, or use ‘Select all’ to take everyone available in one go.
• The number of available staff drops as you invite people, and ‘Your team’ grows to match.
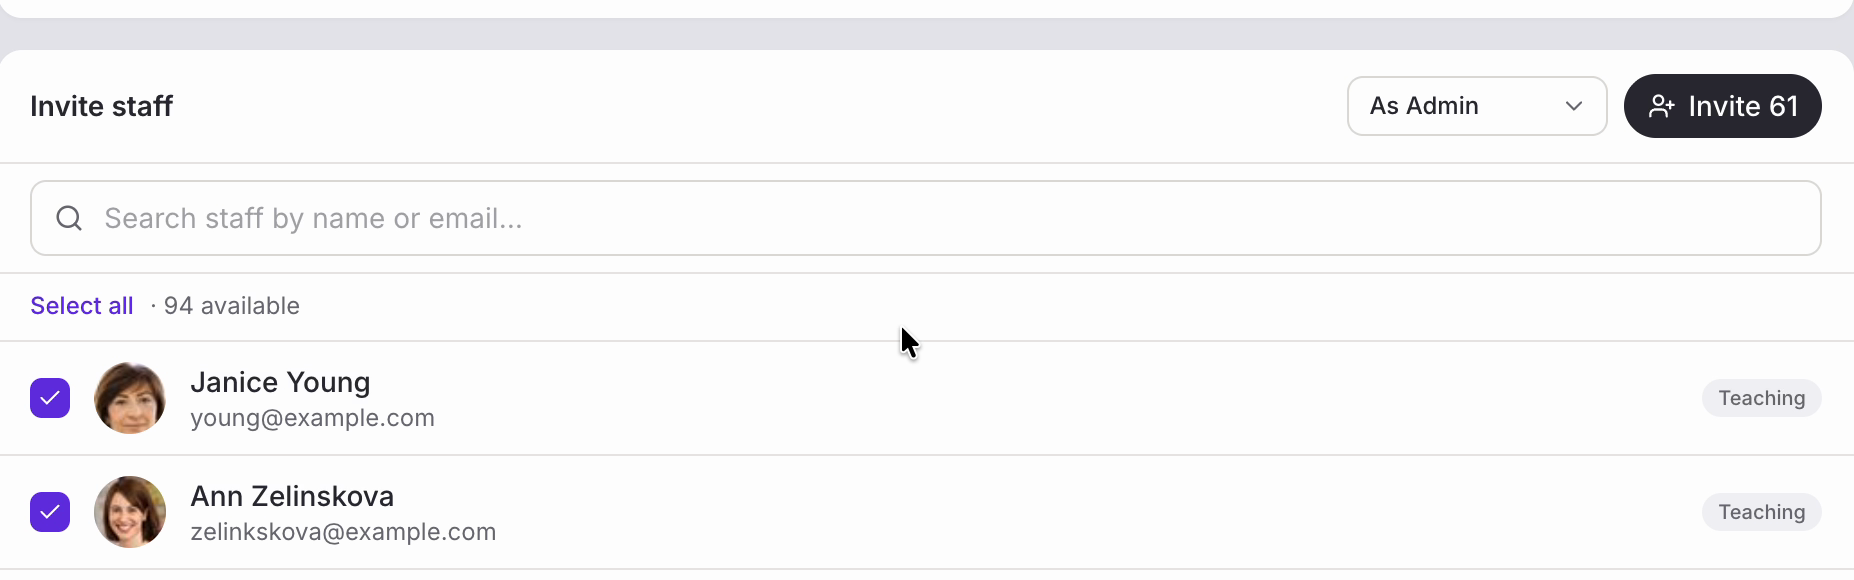
Nb. Because the role applies to the whole batch, the quickest route for a whole staff list is usually to invite everyone as ‘As Teacher’, then change the few who need more using the role dropdown on their row in ‘Your team’.
Checking it worked
• ‘Your team’ now lists everyone you've invited, each with their role and an ‘Invited’ badge, and the count at the top has gone up.
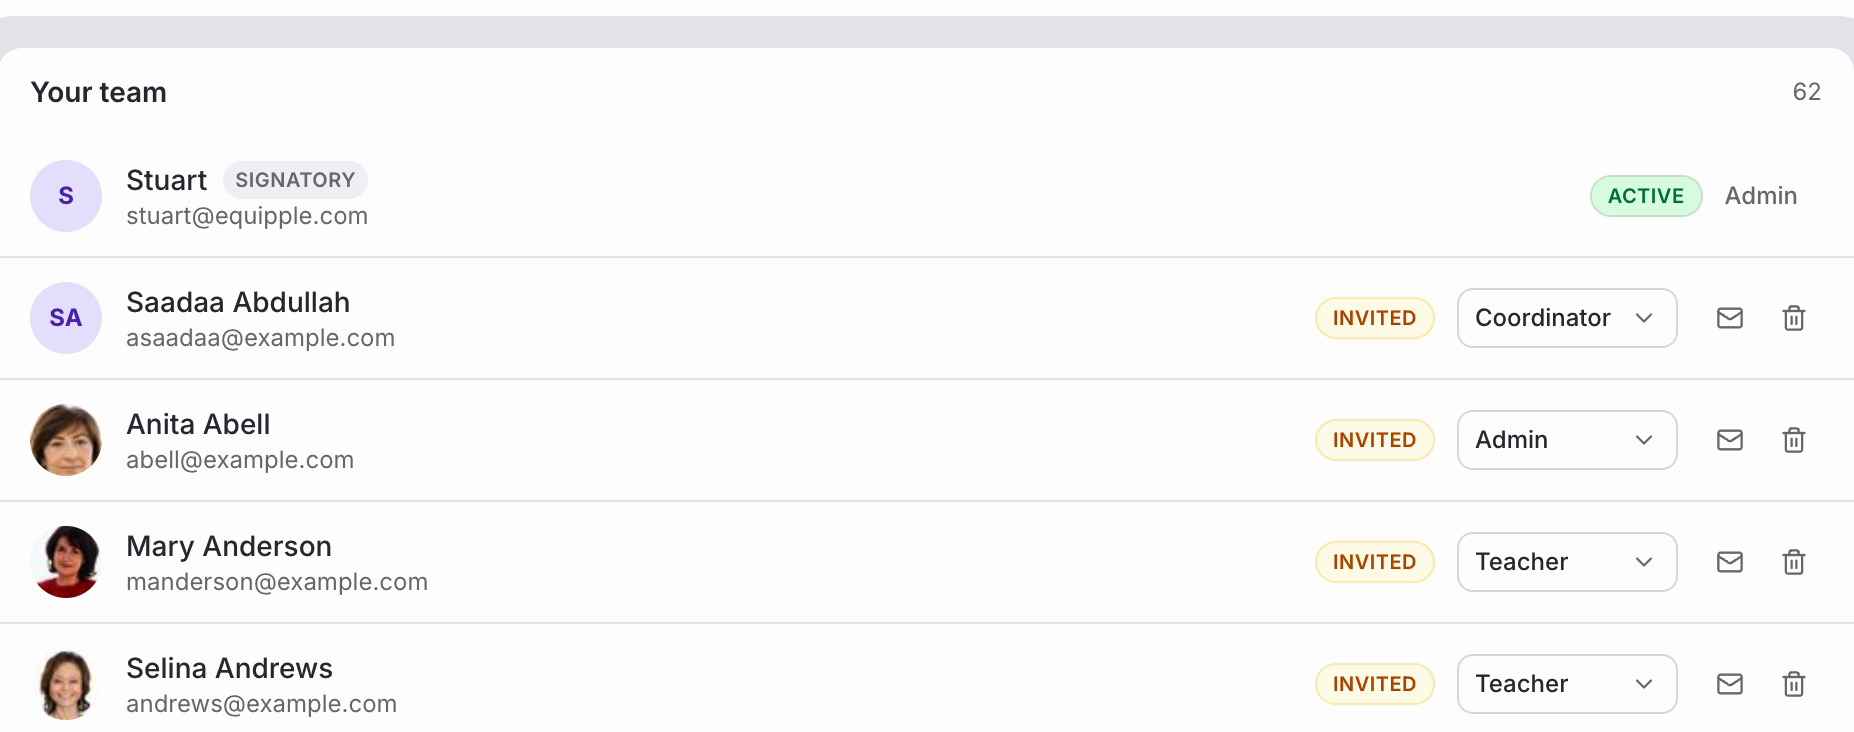
Your colleagues can now sign in. There's nothing else for you to do — the badges will change to ‘Active’ as each of them does.
Was this article helpful?
That’s Great!
Thank you for your feedback
Sorry! We couldn't be helpful
Thank you for your feedback
Feedback sent
We appreciate your effort and will try to fix the article